Saturday, 20 June 2009

ANIMATING THE CAMERA MOVES


Camera animation


It took me a while to fully understand the difference between simply zooming into the scene and actually panning into it. It looks so much better (for instance: the light effects change according to camera move) to pan than zoom that I decided to actually animate camera in 3d and than find a solution to composite the 2D animation on the top.


I also learnt how to make room optically bigger than it really is with altering the camera lens options (animating the depth of the field).

I actually tried also to import 3D object (.obj file) from Maya into AF and animate the camera move there, but it slowed down the rendering time and work itself so much, that I rather decided to drop the idea and rather wait for better times of Adobe package.

VISIT TO SCIENCE MUSEUM- BIRD'S FLIGHT

Visiting a science museum I noticed a great stimulation of Bird's flight which could help us to animate the crane.


There I also saw for the first time one of the objects from Hiroshima, which melted in atomic bomb attack in 1945.

2D ANIMATION-INKING, COLORING, ROTOSCOPING, USING PHOTOSHOP TO ANIMATE, COMPOSITING IN EDITABLELAYERS


2D ANIMATION DRAWING INKING WATER COLOring


The reason I decided to do animation with ink and watercolor is not only because they are my favorite techniques, but also they express the traditional quality of japanese art. Water color infuse a subtle and very versatile quality to the general style. They are very unpredictable and each frame differs from the previous one which creates the effect of glitching movement and so more lifelike feel.


The whole peace is based on the contrast between red and blue, the traditional geisha colors of the characteristic for the time. Red means life power, blue divinity, sublime.


rotoscoping


To draw animated body sequences in some odd angles was too much even for my artistic imagination. So after photographing and filming the references, I printed some of them out and redrew them frame by frame, fitting the style to the one of the main character. This was a really hard job as character is very deformed. Some of other references I used to study the change in facial expressions and shading.

After I Drew the sequence with the pencil, I scanned it in and line tested it on college computers- until I found a better solution- animating it in photoshop. After nearly losing my mind, tracing all the animation I did with the pencil on an animation paper onto the watercolor paper with ink- I found a better solution. I scanned in all the frames, altered them in photoshop to give them more inky look , cleaned them, aligned them and printed them out on the watercolor paper. Once painted I scanned them back in and send them to the group members to cut them out and align them again.


ANIMATING IN PHOTOSHOP- CUTTING IT OUT, ALIGNING, COMPOSITING


First of all I learnt how to simulate light box when one doesn't want to spend more than £10 on it! :-)

As said before I helped myself with rotoscoping reference when animating some of very complicated perspective angles. After painting the animation by hand (the process explained in Rotoscoping folder), I scanned it in. I cleaned the white background out with the help of MASKS in Photoshop. These enabled me to simply paint back in case I wiped too much out, while using magic wand or rubber, wouldn't give an option to return once done.Once cut out- I aligned the objects together and opened the animation timeline in Photoshop. This feature was available already in CS3, but it became even more appropriate to use in CS4. It allowes quick line test and once the position and duration of frames is sorted out, can be easily exported into any postproduction software in a shape of layers.


3D ANIMATION- FIXING OTHER PEOPLE's WORK


FIXNG 3D AniMATION


I haven't been really satisfied with any animation that other members passed back to me. Simon's fish animation (by the way he duplicated fish instead instance it again! And as soon he wanted to change the curve on which the fish moves - in order to get different timing- the animation cracked- the problem was in joint orientation of the fish) and Dan's Clock trees needed minor refinement( they bent a bit too high, so the animation looked a bit odd for feathers). I changed both animations working within graph editor (changing the lengths and heights between frames, reshaping the curves, so it floated more smoothly.)

FILMING REFERENCE

SECOND REFERENCE PHOTOGRAPHS AND FILMING


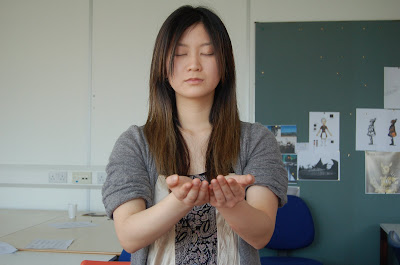
because film was more defined on that stage we decided to make another photo and film reference as to help clarifying animation of the body in some rather odd camera angles (top down, from the underneath, run from behind) in case we need it for rotoscoping. This time we got a more willing actress and dan played all the rest of the family members :-)! For crane flight I found some reference of flight sequence in Science Museum. I actually took pictures of each sequence of the film.

Thursday, 19 March 2009

The beginnings of animation

I tried out some movements with rough pencil animation:


also I prepared the fish to be animated with help of REFERENCE OBJECTS:


I would advise that to everyone who has a massive scene, but in this case the file in which we work always has to be accompanied by the file we are referencing from.


RENDERING

rendering


Firstly I tried out different rendering options in Maya, to see what happens to the lights, sharpeness of the edges, glows and reflections. As Can be seen on the picture references, Mental Ray behaved a bit strange with the see through objects, although it gave some interesting scattered look.

Maya Hardware left edges pixelated.

Maya Software Rendering seemed to behave the best of them as it left surfaces smooth, object's edges crisp and kept the transparency. I gave other members of the group to try out other options of rendering which could help us to achieve profuse look of paper (like subsurface scattering and ambient occlusion for instance), but it all turned out bad so I decided to simply go for Maya Software.

Mental ray

Maya software seems to leave the surfaces soft and crisp definition still:


Maya hardware made surface pixialted:


We made the decision to render out all in separately editable layers in order to have more control over them in compositing phase. For that I needed to sort out all the proper naming of the objects, assign them to the layers and then create rendering layers.